
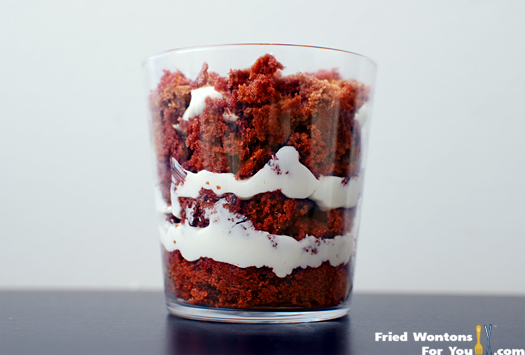
A classic red velvet cake with cream cheese frosting, shared by guest blogger Shao. Bake it as a layer cake, as cupcakes, or crumble it into glasses with layers of frosting as she does here.
I am very pleased to introduce you to my dear friend, Shao from FriedWontons4U.com. She’s a wonderful food blogger with artistic photography styles AND she’s a sweetheart on Twitter. If you’re not following her already, make sure you check her out! Thank you, Shao for sharing this wonderful recipe :)
As much as I talk and tweet about craving sweets late at night, when it comes to satisfying my sweet tooth I am quite picky. I prefer sorbets over ice cream. I’m not a big fan of chocolate. I enjoy cakes with light fluffy cream over rich frosting. I only like pies with a crumb topping. To sum it all up: picky, picky, picky. Yet regardless of all these preferences, when it comes to Red Velvet Cake, all of that doesn’t matter.
It’s chocolatey and covered in layers of rich cream cheese frosting. Red Velvet Cake is an American southern classic. It’s usually presented as a three layer cake with frosting in between each layers and spread on top. In more contemporary forms, it has been transformed into cupcakes, whoopie pies, and cookies. Originally beetroot, instead of red food coloring, was used to “dye” the cake a rich red hue. It’s simple to bake and highly addictive to eat.
Now when I say simple to bake, I should be honest and confess to you the silly mistake I made when making this cake. While trying to do two things at once, catching up on a TV show and baking, I accidentally added 16 ounces of granulated sugar instead of powdered sugar into the frosting mix. DO NOT make this mistake unless you prefer crunchy frosting.
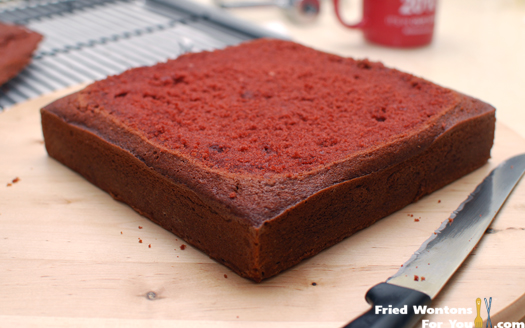
The original recipe calls for the cake to be baked in two 9 inch round cake pans. I decided to take a more contemporary approach to it. I baked the whole batter in an 8 inch by 8 inch square cake pan, crumbled the cake into big chunks, and served it in a glass with frosting in between each layer. You can also turn this batter into cupcakes simply by baking it in a cupcake pan. No matter how you present it, you can’t go wrong. It’s one of my favorite desserts and I hope it will be yours as well.
Red Velvet Cake Ingredients
From Cooks Illustrated Magazine. Serves 12.
For the Cake
- 11 ¼ ounces unbleached all purpose flour
- 1 ½ teaspoons baking soda
- Pinch table salt
- 1 cup buttermilk
- 1 tablespoon white vinegar
- 1 teaspoon vanilla extract
- 2 large eggs
- 2 tablespoons natural cocoa powder (do not use Dutch processed cocoa; it will not rise properly or give you the correct red colouring)
- 2 tablespoons (or a 1 ounce bottle) red food colouring
- 12 tablespoons unsalted butter, softened
- 10 ½ ounces granulated sugar
For the Cream Cheese Frosting
- 16 tablespoons unsalted butter, softened
- 16 ounces confectioners’ (icing) sugar
- 16 ounces cream cheese, softened
- 1 ½ teaspoons vanilla extract
- Pinch table salt
How to Make Red Velvet Cake
- Make sure your oven racks are in the centre of the oven and preheat the oven to 350°F (180°C).
- In a medium bowl, add the flour, baking soda, and salt. Mix the ingredients until they are well incorporated.
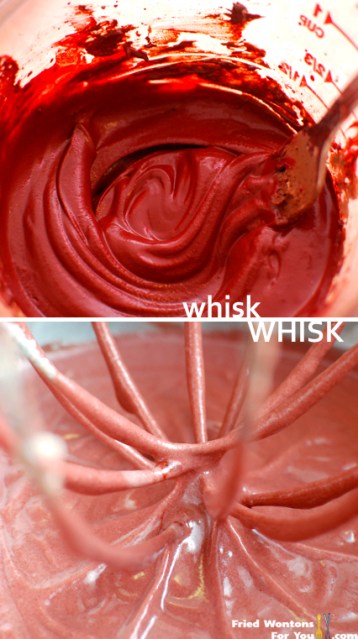
- In a large measuring cup, add the buttermilk, vinegar, vanilla, and eggs. Whisk the ingredients until combined.
- In a small bowl, add the cocoa powder and food colouring. Mix until it forms a smooth paste.
- In a stand mixer with a whisk attachment, add the softened butter and sugar. Mix on medium high speed until the ingredients are fluffy and smooth, scraping down the bowl as necessary to ensure the mixture is well combined. This should take about 2 to 3 minutes.
- Add one third of the flour, baking soda, and salt mixture. Mix on medium high until incorporated.
- Add half of the buttermilk, vinegar, vanilla, and egg mixture. Mix on low speed until combined. Scrape the bowl down, whisk more on low, and make sure everything is combined.
- Repeat with the next third of the flour mixture and mix on medium high. Add the remaining buttermilk mixture and mix on low. Add the rest of the flour mixture and mix well on medium high, scraping down your mixing bowl as you mix.
- Finally add the cocoa and food colouring paste. Mix on medium high. When everything is mixed, remove the bowl from the mixer and give the batter a final stir with a rubber spatula to check that everything is well incorporated.
- Grease your pans well with butter and flour them lightly. This recipe was made to be baked in two 9 inch cake pans, but you can also bake it in a large sheet pan or cupcake pans.
- Pour the batter into your pans. It should take between 25 to 30 minutes to bake. If you are using a large sheet pan or cupcake pan, check the cake at 20 minutes. Insert a toothpick into the cake and if it comes out clean it’s ready.
- Let the cake cool in the pan for 10 minutes and then turn it out onto a wire rack to cool for 30 minutes before frosting.
How to Make the Cream Cheese Frosting
- In a stand mixer with a whisk attachment, add the softened butter and sugar. Mix on medium high speed until fluffy and smooth. This should take 2 to 3 minutes.
- Add the cream cheese in small pieces as it mixes. Scrape down the bowl and mix until all the cream cheese is added and well incorporated.
- Add the vanilla extract and salt. Mix well.
- Set the frosting aside and store in the refrigerator until ready to use.
How to Frost and Serve
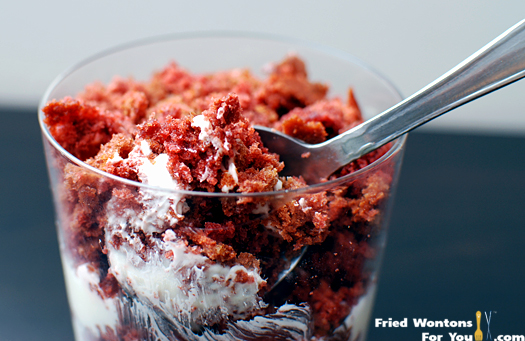
If you baked it in two cake pans, add the frosting on top of one layer, place the second cake on top, and cover the top and sides with more frosting. If you baked it in cupcake pans, just pipe or spread the frosting on top. To serve it in a cup as pictured in this post, break the cake up into large bite size pieces, place a layer of cake in the cup, top it with frosting, add another layer, add more frosting, top it off with more cake, and finish with more frosting.


Leave a Reply